How to Create a Divi Accordion Menu in 4 easy steps
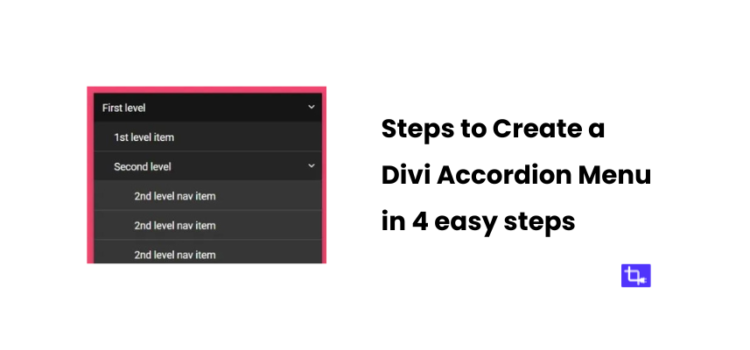
Want to know how to create a sleek and responsive Divi accordion menu to enhance your site’s navigation? You’re in the right place!
In this guide, I’m going to show you how to create a Divi accordion menu using the WPB Accordion Menu plugin step-by-step. With this you will be able to create a collapsible menu to clean up your site’s layout.
The beauty of using an accordion menu is that it keeps your site looking clean and professional. It gives visitors quick access to all the important pages. Also, you’ll love how easy it is to set up with just a few clicks.
Did you know that using accordion menus can also help with your site’s loading times? Faster loading times lead to better user engagement and can positively affect your SEO.
By creating a Divi accordion menu you’ll also be helping your site’s visibility in search engines. Let’s dive into the key benefits before we get started on the setup.
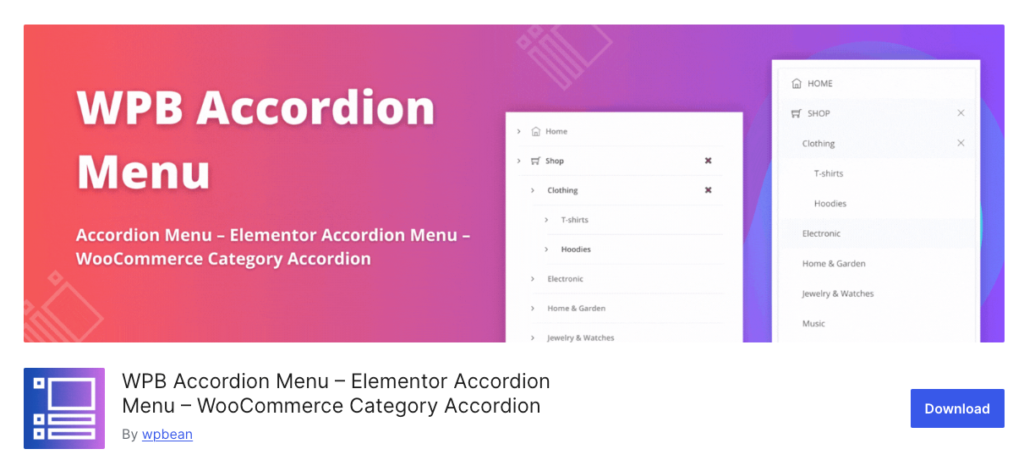
Why Use a Divi Accordion Menu?
Improves User Experience
One of the biggest advantages of using a Divi accordion menu is how much it improves the overall user experience. You don’t want to scroll through endless content just to find what you’re looking for when you visit a website, right?
Accordion menus can organize large amounts of information. This way visitors can quickly and easily find what they need. Users can navigate through your site without feeling overwhelmed when you break down content into bite-sized, clickable sections.
Mobile-Friendly Design
More and more people are browsing on their phones nowadays. A Divi accordion menu is perfect for mobile users. Because it’s collapsible and makes navigating smaller screens more comfortable.
Visitors can simply tap on the sections they want to open without scrolling through long lists of links. An accordion menu is a must if you want a mobile-friendly website that’s easy to navigate.
SEO Benefits
You might be wondering – How can an accordion menu help with SEO? Well, accordion menus only load content when it’s clicked. They can help improve your site’s loading time. This is something search engines love.
You’re reducing the initial page load by keeping your content hidden until needed. This can lead to a faster site and better search engine rankings. And, of course, a cleaner site layout helps search engines understand your structure better. This boosts your visibility.
Steps to create Divi Accordion Menu
Want to know how to create a Divi accordion menu that looks sleek and improves user experience? Perfect, now I’ll show you how to create one step-by-step using the WPB Accordion Menu plugin. Let’s first make sure everything is in place before we dive in.
Step 1: Setting Up Your WordPress Environment
Let’s prep the environment before we start creating your Divi accordion menu. Here’s what I like to do before adding new features to any WordPress site.
Install and Activate Divi Theme on WordPress
Since we’re focusing on creating a Divi accordion menu make sure the Divi theme is installed and activated. If not, you need to install and activate the Divi theme.

Simply head to your WordPress dashboard, navigate to “Appearance” > “Themes” > “Add New,” upload the Divi theme, and hit “Install” followed by “Activate.” It would be best if you worked on the Divi child theme and to do so upload the child theme alongside the parent theme of Divi.
Prepare Your WordPress Site
Now, let’s make sure your WordPress site is ready for the new accordion menu. Update Divi to the latest version for ensuring compatibility.
Update WordPress and Plugins
Always make sure your WordPress core, theme, and plugins are up to date. Outdated themes or plugins can cause compatibility issues or even crashes.
So, take a moment to update everything. Don’t forget to back up your site.
Backup Your Site
It’s smart to create a full backup of your WordPress site before making significant changes. I highly recommend using a reliable plugin like UpdraftPlus and All In One Migration.
These plugins are easy to use and lets you backup your entire site with just a few clicks. You’ll be ready to create your collapsible menu without any worries Once your site is backed up.
Step 2: Installing and Activating the WPB Accordion Menu Plugin
With your site all set up and the Divi theme in place, it’s time to install the WPB Accordion Menu plugin, which is essential for creating a collapsible menu.
i) Finding the Plugin
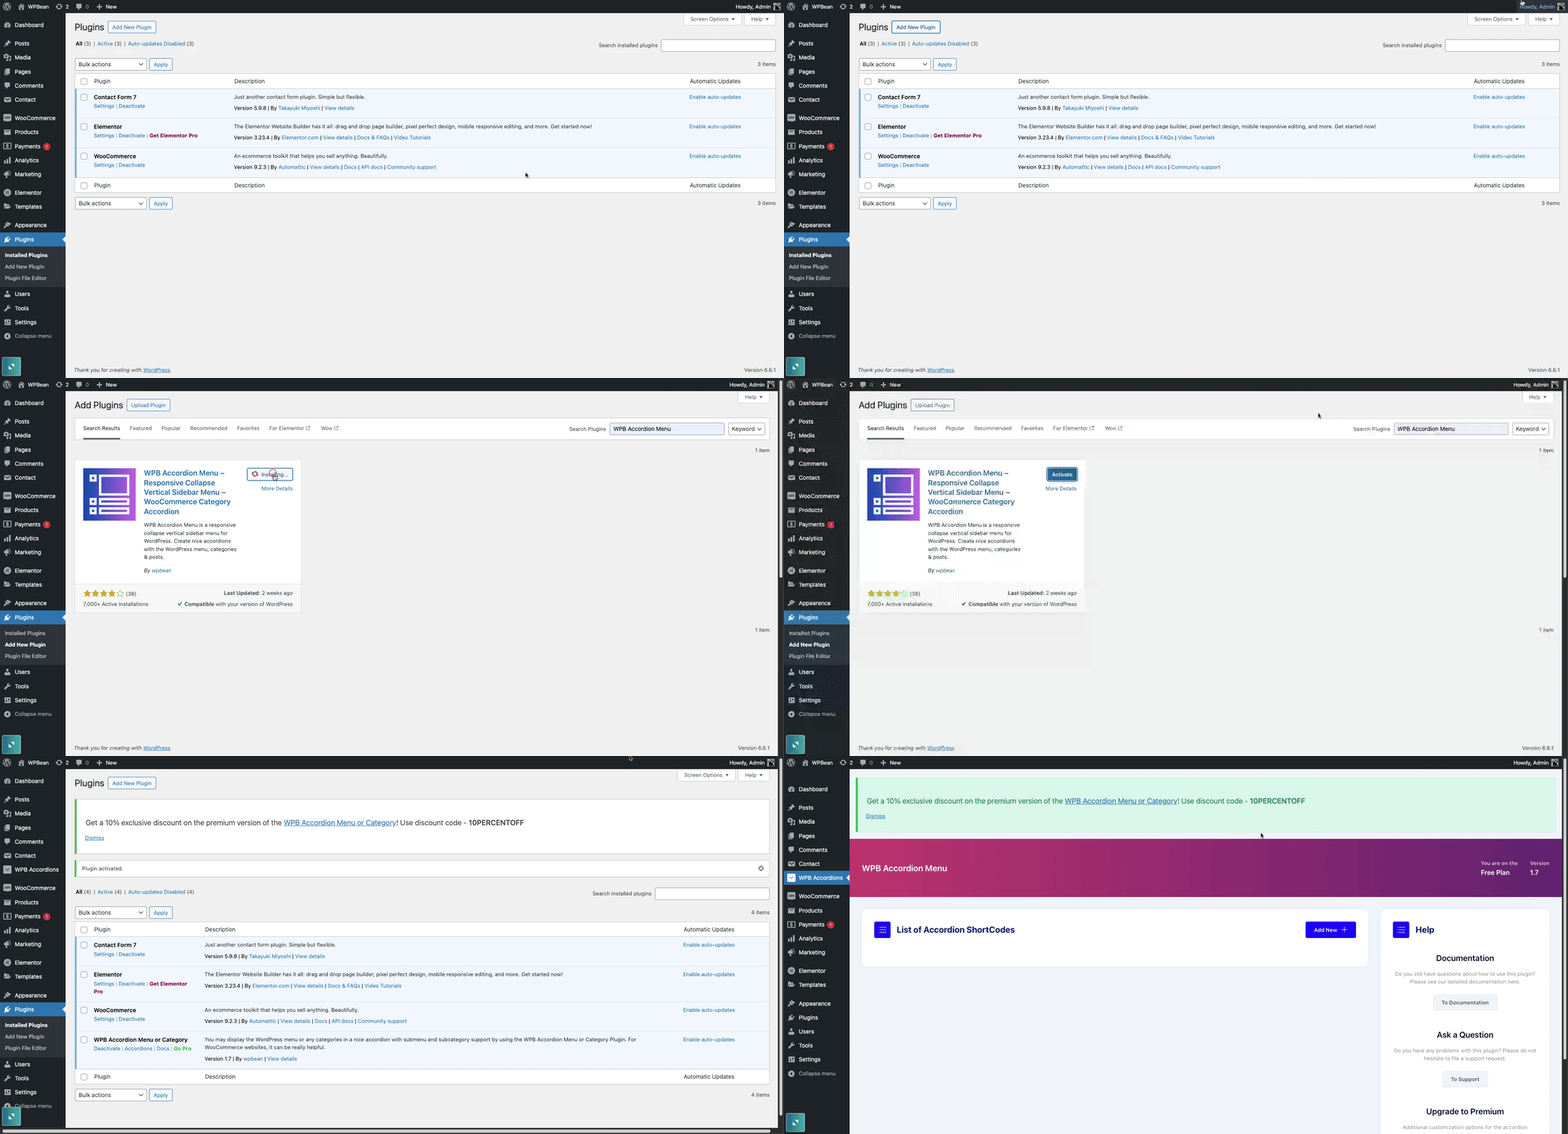
To get started, navigate to your WordPress dashboard, click on “Plugins” in the left-hand menu, then “Add New.” In the search bar, type WPB Accordion Menu. Once you find it, click “Install Now.” You can also download the free version from the WordPress repository.
ii) Installing the Plugin
If you’d rather install it manually, you can download the plugin’s zip file from the WordPress Plugin Directory and upload it by clicking the “Upload Plugin” button. Either method works fine.
iii) Activating the Plugin
After installation, click the “Activate” button. You’ll notice a new “WPB Accordions” tab in your WordPress dashboard. This is where you’ll create and manage your collapsible menus.
Step 3: Creating Your First Divi Accordion Menu
Now that you’ve activated the plugin, it’s time to create your divi accordion menu.
i) Accessing the WPB Accordion Menu
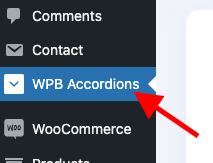
Head over to the WPB Accordion Menu in your WordPress dashboard. You’ll see an option to “Create a New Menu”.

Click on it, give your new collapsible menu a name (for example, “Divi Accordion Menu” or “Mobile Accordion Menu”) and hit “OK.”
ii) Creating the Menu
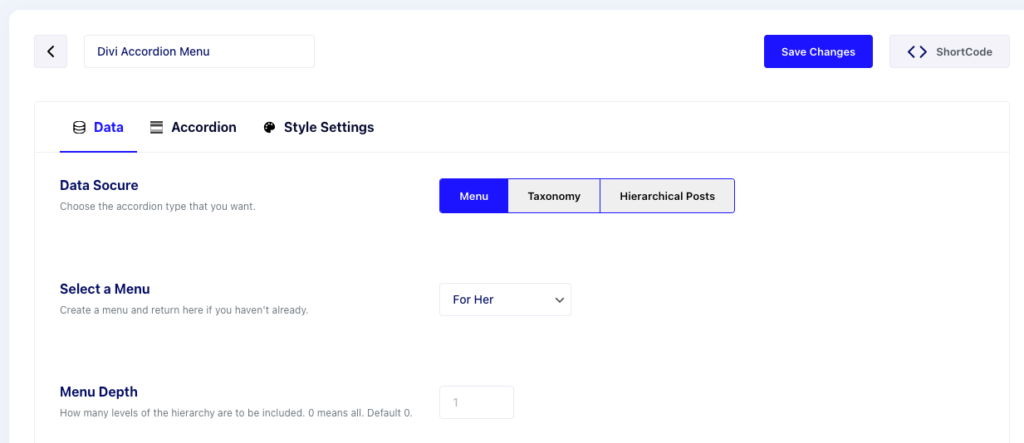
Once you’ve named your menu, click on it to start creating your Divi accordion menu. You’ll have the option to choose from your existing menus, categories, or hierarchical posts. Select the menu or content you want to display in your accordion.
Don’t forget to adjust the “Menu Depth” under the “Data” tab. This helps to control how deep the accordion will go (i.e., how many levels of submenus you want).
iii) Customizing the Look and Feel
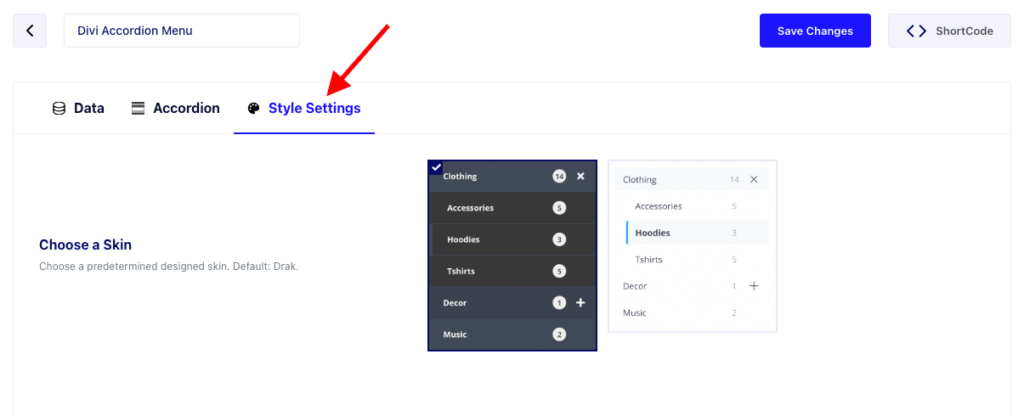
The WPB Accordion Menu plugin comes with two skins in the free version. The premium version offers extra features like custom colors, fonts, and layouts if you want more customization.
You can grab WPB Accordion Menu Pro to unlock these additional skins and tweak the menu’s appearance to perfectly match your site’s design.
iv) Adding the Menu to Your Site
After customizing your collapsible menu, you’ll want to add it to your website. The plugin provides several options for embedding the menu. You can:
- Copy the shortcode and paste it anywhere on your site, like in the header, footer, or sidebar.
- Use the PHP code if you prefer more advanced customization.
You can place your Divi accordion menu wherever it fits best within your site’s structure.
Step 4: Saving and Previewing Your Menu

Hit the “Save” button once you’re satisfied with how your menu looks and behaves. Now, preview your site to see the accordion menu in action.
You can always jump back into the settings and tweak things until it’s perfect if it’s not quite right.
And there you go! You’ve successfully created a Divi accordion menu using the WPB Accordion Menu plugin. It should be looking great on your Divi-themed WordPress site.
Ready to take things even further? In the next section, I’ll show you how to enhance your Divi accordion menu’s functionality to make it even more dynamic and user-friendly. Stay tuned!
Enhancing Your Divi Accordion Menu’s Functionality
Adding Icons to Accordion Menu Items
Want to give your Divi accordion menu a bit more personality? Adding icons next to your menu items is a great way to make it more visually appealing and user-friendly. Also, icons can help guide users by making navigation more easy.
Adding icons is a step I always recommend when thinking about how to create a Divi accordion menu.
But remember, don’t go overboard. Icons should complement the menu rather than overwhelm it. Stick to the basics and choose icons that match your site’s design.
You can either use an icon library, like FontAwesome, or upload your own custom SVGs. Even if you’re not a coding expert WPB Accordion Menu makes it easy to integrate icons. Just go into the menu settings, select the items you want to add icons to. Or pick from the built-in library or upload your own custom icons. It’s that simple!
Troubleshooting Common Issues
Divi Accordion Menu Not Displaying Correctly?
Sometimes, things just don’t go as smoothly as we’d like. If your Divi accordion menu isn’t displaying properly, don’t panic! The first thing I do is check for conflicts with other plugins or themes. Sometimes, certain plugins can interfere with the WPB Accordion Menu’s functionality.
Next, make sure you’ve placed the shortcode correctly and double-check your Divi module settings. A misplaced shortcode can easily cause issues. If all else fails, deactivate other plugins one by one to see if any of them are causing the problem.
Slow Load Times?
If you notice your accordion menu slowing down your site, there are a couple of quick fixes. First, optimize any images or icons you’ve added to the accordion. Large, unoptimized images can bog down your site’s load time.
Also, I recommend using a caching plugin. This will help speed up your site by saving a version of your pages so they don’t have to reload every time someone visits. A faster website is not just better for user experience—it’s better for SEO too.
Best Practices for Creating an Effective Accordion Menu
Keep it Simple and Intuitive
It’s tempting to load up your accordion menu with all your site’s pages. But less is more. Too many options can overwhelm users.
So try to keep your menu simple. When I’m setting up a Divi accordion menu, I like to limit the number of items in each section and make sure everything is labeled clearly.
Organized categories and concise labels are key to ensuring easy navigation. Remember, your accordion menu should enhance the user experience, not confuse it.
Test on Different Devices and Browsers
One of the most important steps in creating a successful Divi accordion menu is ensuring it works well on all devices, especially mobile. I always recommend testing your menu’s responsiveness across different devices and browsers.
There are tons of online tools you can use to preview how your menu looks on various screen sizes. And don’t forget to test it yourself on an actual mobile device to see how it feels in the real world. A mobile-friendly menu can make all the difference in user satisfaction.
Final Touches and Going Live
Preview Your Accordion Menu
Before you officially go live, take a moment to preview your Divi accordion menu. It’s always a good idea to double-check for any last-minute adjustments. Look at the design consistency—do the icons fit well with the overall layout? Are the animations running smoothly? If something feels off, go back into the settings and tweak it until you’re happy with the result.
Going Live with Your Accordion Menu
Once you’re satisfied with your Divi accordion menu, it’s time to take it live! Publishing your new accordion menu is as easy as hitting the “Publish” button. A well-designed accordion menu improves both user experience and navigation. Which can ultimately help boost your site’s SEO performance.
Conclusion
I’ve walked you through how to create a Divi accordion menu using the WPB Accordion Menu plugin in this post. You should have a fully customized and functional accordion menu by now.
Remember, your site’s navigation plays a huge role in user experience. A well-designed accordion menu can help streamline that experience. Don’t be afraid to experiment with different designs and icons to make your menu uniquely yours.
If you run into any challenges, feel free to revisit the troubleshooting tips or drop a comment below for some extra help!
Good luck, and happy designing!



1 thought on “How to Create a Divi Accordion Menu in 4 easy steps”
Comments are closed.