Most Important Tasks You Should Complete after Installing WooCommerce
The first and utmost step for starting an ecommerce website with WordPress is to install WordPress on a hosting account with domain name. After installing WordPress on a hosting server you need three component must for make a regular website to an ecommerce website and that’s are product pages, shopping cart and checkout process.
So, we need a plugin which gives us the following functionalities. And there have a lot of available plugins to turn your regular WordPress site into an ecommerce shop, but by far and away the leader is WooCommerce.
WooComerce is the best SEO friendly free plugin by WooThemes, and it has ton of options and documentation for your need. Installing WordPress and WooCommerce in your site is not the only step to start your online shop, it’s the starting point and you should do next to complete your shop. Here, in this article, I have covered the most important tasks that every online retailer should complete after installing WooCommerce.
Go Ahead with WooCommerce Quick Setup
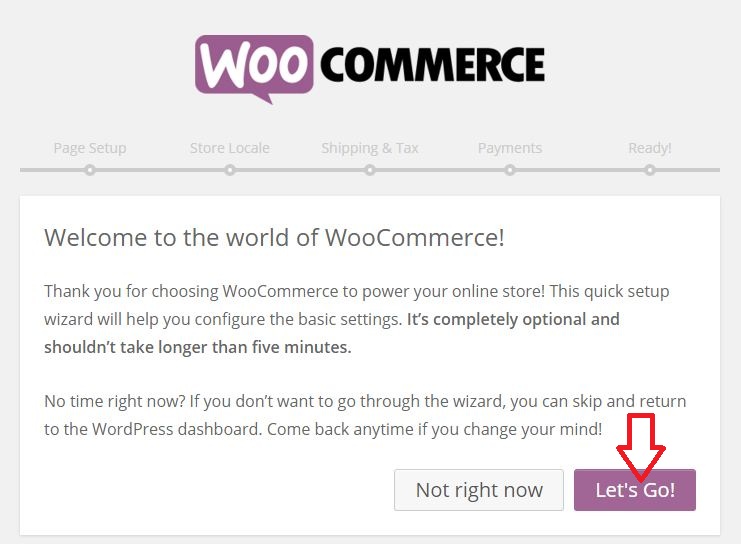 After activating WooCommerce plugin, you’ll prompted to a quick setup wizard that will help you to configure the basic settings of WooCommerce. These are the essential and recommended settings to run an ecommerce site, like Page Setup (Shop, Cart, Checkout, and My Account), Shop Location, Shipping & Tax Information, and Payment Option. Go ahead to get the quick setup.
Check System Status
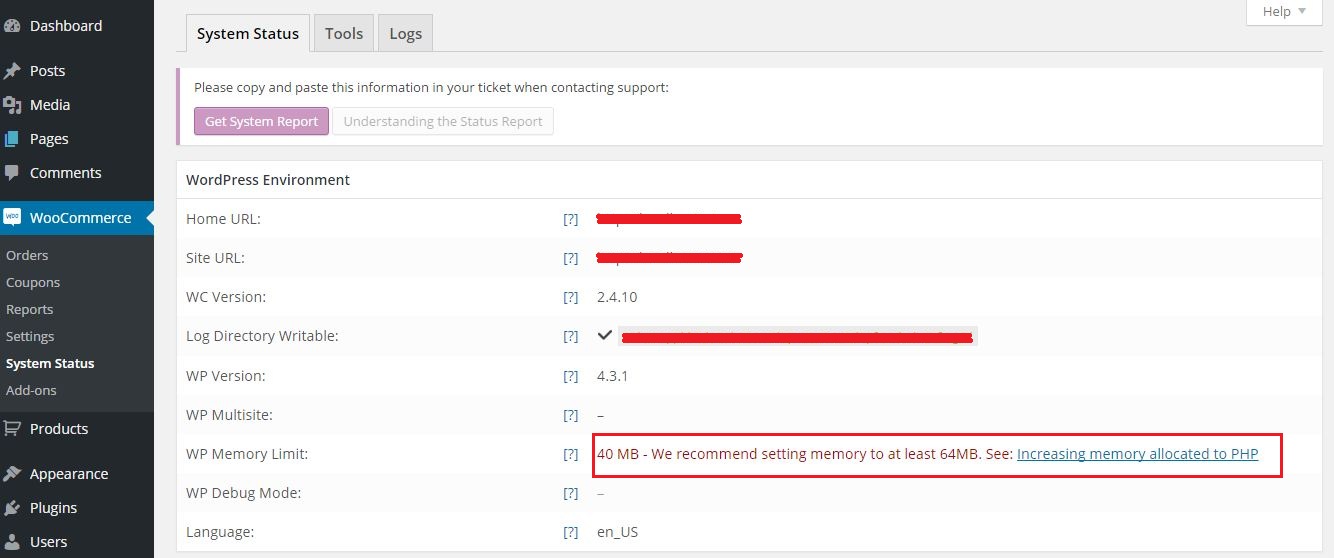 In this section, you can get the technical information about your site. Here, you’ll see a warning if you have the lack of memory from your hosting company. To increase the memory size in WordPress you can follow the instructions in below:
- Go to your websites cPanel -> File Manager-> wp-config.php
- Open this file (wp-config.php) with Code Editor
- Find out the statement define(‘WP_DEBUG’, false);
- Paste the following statements before previous statement
/** Memory Limit */
define (‘WP_MEMORY_LIMIT’, ’96M’); - Now hit the Save button and go back your Dashboard and refresh the page and you’ll see the memory size in WordPress is 96MB now.
Setup Online Store Structure
 Your online shop needs a product archive page which going to display all your products and categories. WooCommerce lets you this functionality. It uses a standard WordPress page for this archive. By default, its use a page named “Shop” for this archive but you can edit the name of this page or leave it as default.
Make your shop archive as your homepage. Go to the main Settings -> Reading and change the Front page displays to A static page and select Shop page as Front page.
Configure Product Permalinks for better SEO
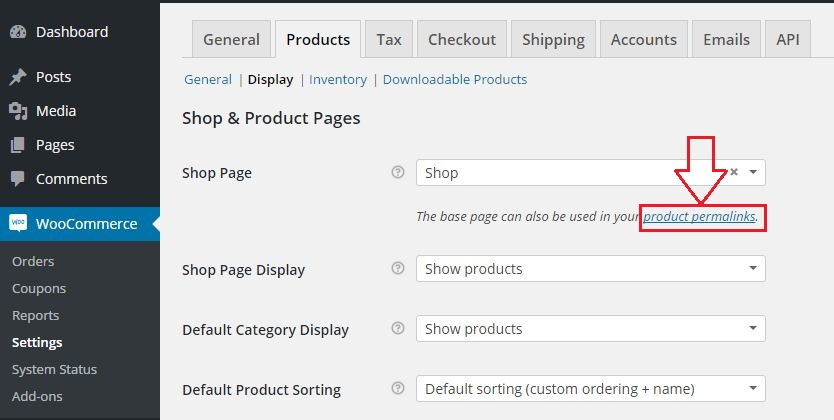 After confirming the product archive page, click the link to look at the Product Permalinks. In this section, you can set your WordPress permalinks and Product permalinks. These permalinks are arranged in a structured way so they will never conflict with your blog post categories (you may write your blog post with your e-shop).
Styling Product Image
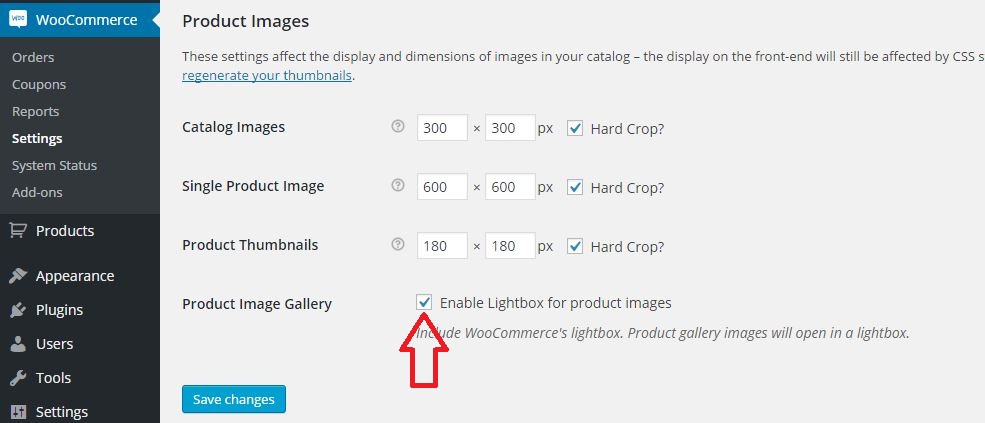 Check the box to Enable Lightbox from WooCommerce -> Settings -> Products -> Display.
You should double-check the product images at this section. Configure the size of images according to your need. WooCommerce allows to set Catalog Images (appears in category pages), Single Product Images (the featured image of every single product), and Product Thumbnails (appears below the featured image on product pages).
Customize Every Aspect of the Experience
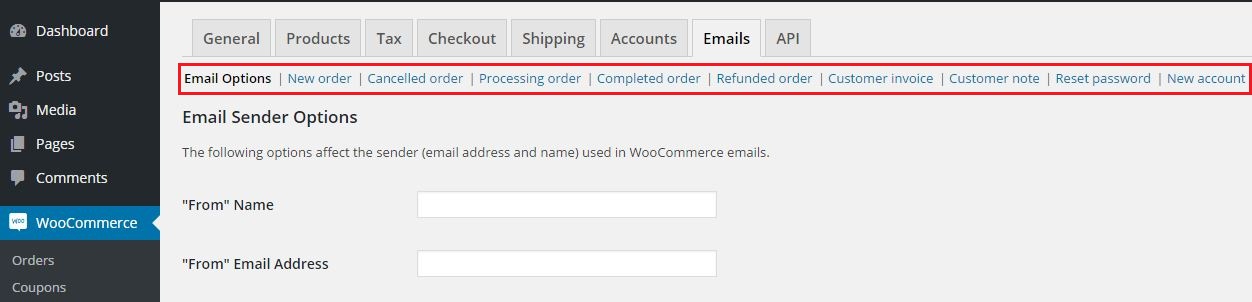 WooCommerce allows you to customize every aspect of the experience for your customer. There have a lot of options to send automatic email for every aspect. You can also edit the email template.
Get Your Required Extensions
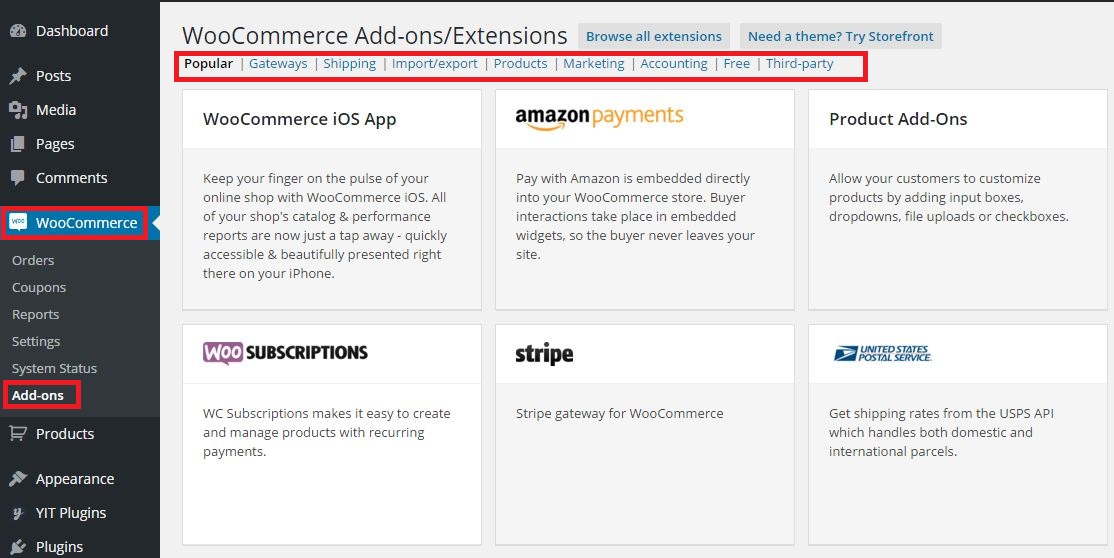 WooCommerce is a free WordPress plugin and it also allows you to get access of a huge range of extensions that you may say “plugins of plugin”. Most of the extensions are paid but the cost is less and helps you to working much faster than a custom solution.
Use Security Plugins
You should use one of a top security plugin in your online shop. It’s highly recommended to use a security plugin in ecommerce websites to protect that site from malicious attacks. Using multiple security plugins will have dire consequence like breaking down websites content.
Get a Compatible WordPress Theme
WooCommerce have a lots of functionality that some themes aren’t built to handle or output correctly. So, it’s important to find out a compatible theme that doesn’t produce product pages as garbled and ugly. You can find many compatible and high-quality theme from marketplace like ThemeForest but they are premium and paid. You can also get free WooCommerce theme from wordpress.org/themes.
Add SSL Certificates
Adding SSL certificates on ecommerce site is essential, especially on the checkout and account login pages because the information’s of these pages are very sensitive. So it’s vital that these information’s are travels over an encrypted channel.
After installing SSL, navigate to WooCommerce -> Settings and enable “Force Secure Checkout”
Adding SSL Certificate is quite costly, if you are a beginner than start your shop with a popular security plugin. Don’t forget to remove the ‘admin’ username and must use a stronger password, than your site will be little bit safer.
Creating an e-commerce site is a time consuming and continuous task. Through this article, you’ve successfully configure the most important tasks of WooCommerce store. There have multiple other settings you can configure that is covered by WooCommerce documentation here. If you have any question about the setup, let us know in the comments.
Related Posts

Best Product Gallery WooCommerce Plugins in 2026 (Free & Premium)
Best Product Gallery WooCommerce Plugins in 2026 (Free & Premium)
Replace 5+ WordPress Plugins with One: The Ultimate WooCommerce Product Gallery Plugin Guide (2026)
Replace 5+ WordPress Plugins with One: The Ultimate WooCommerce Product Gallery Plugin Guide (2026)