Get more leads & sales with WPB Form Popup: Installation and setup guide
Want to take your website to the next level? WPB Form Popup can be your secret weapon for getting visitors to interact with your site and take action. This guide will walk you through everything you need to know, from setting it up to creating awesome popups.
What is WPB Form Popup?
Imagine a little box that pops up on your website. Instead of being annoying, it can actually be really helpful! WPB Form Popup lets you create these popups that can hold things like contact forms, signup forms, or anything else you need to collect information from visitors. This way, you can turn those visitors into leads and grow your business.
Why Use WPB Form Popup?
There are a bunch of reasons to choose WPB Form Popup. First, it’s super easy to use, no matter if you’re a tech whiz or just starting out. Second, it lets you customize the popups to match your website perfectly. Plus, it works with all sorts of popular WordPress form plugins so you can keep track of all the new leads you’re getting.
This form popup builder has integrations with Contact Form 7, Fluent Forms, Formidable Forms, Happyforms, WPForms, Mailchimp, Kali Forms, User Registration, Form Maker, Happyforms, Everest Forms, Bookly, and many more!
This plugin supports popular themes including Astra, Ocean WP, Hestia, Kadence, Neve, Blocksy, GeneratePress, StudioPress, Hello Elementor, Divi, Storefront, Flatsome, Avada, The7, etc. You can also use WPB Form Popup seamlessly with most used page builders including Gutenberg, Elementor & Elementor Pro, Divi, WPBakery, Visual Composer, Beaver Builder, Oxygen, and GeneratePress.
Installation guide: Getting Started with WPB Form Popup
How to install a WordPress plugin?
Adding a WordPress plugin including WPB Form Popup to your website is actually quite easy. You won’t need any technical knowledge for this. Below we guide you step by step for installing a plugin on a WordPress website.
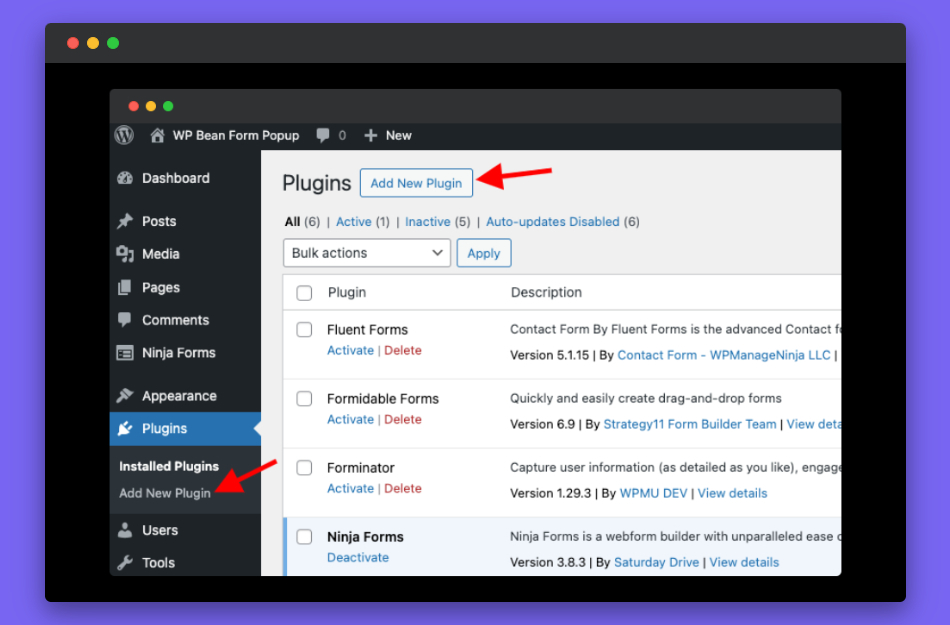
Adding a new plugin on WordPress:
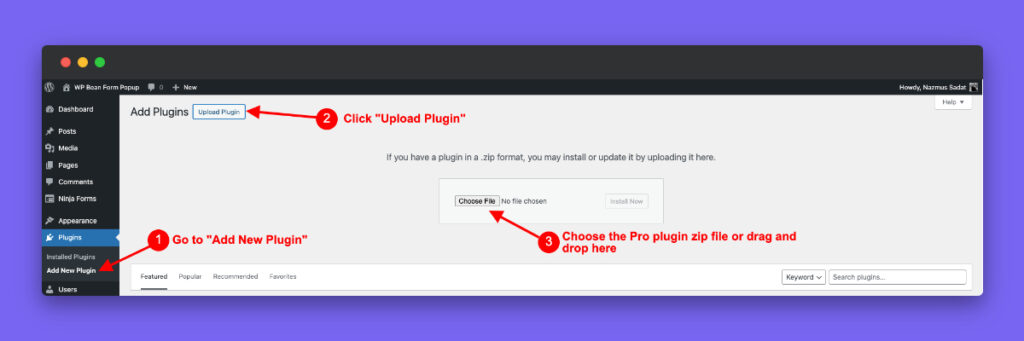
- First, head over to your WordPress website dashboard, find the “Plugins” section, and click on “Add New Plugin”.
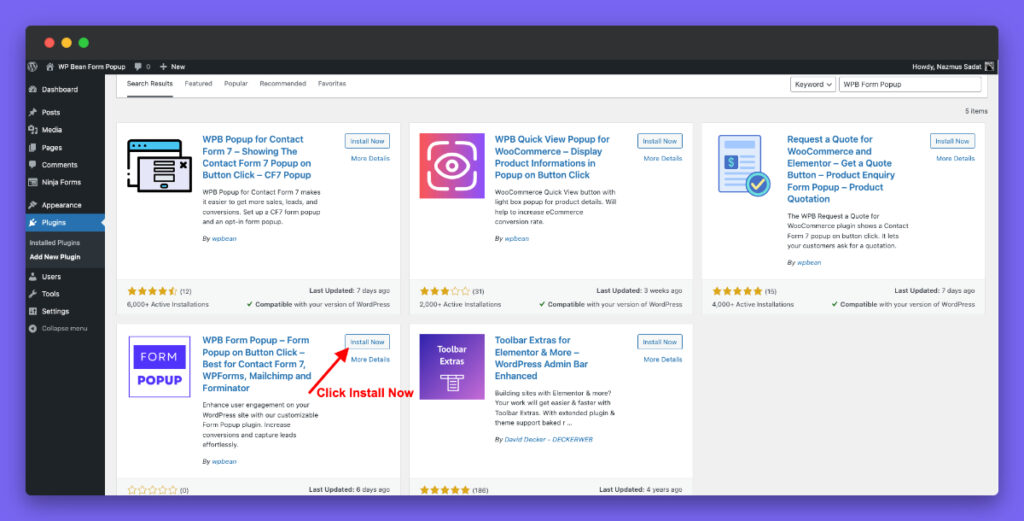
Installing and activating the free version of WPB Form Popup:
- Want to use the free form popup builder plugin only? Just search for “WPB Form Popup” in the search bar. When the form builder plugin comes up on the result page of the WordPress repository click the “Install Now” button and then activate it.
Uploading and installing WPB Form Popup Pro:
- You can get access to exclusive features of by purchasing license of WPB Form Popup Pro. The premium version includes advanced pop-up trigger options, custom CSS ID or class as a pop-up trigger, an image to initiate a pop-up window, pop-ups activated upon load, exit, or scroll, and more! Also, you will get access to a variety of eye-catching pop-up layouts.
- After purchasing the WPB Form Popup Pro plugin, you can download the Pro plugin from “My Account‘ on the official WP Bean website. Also, you can download the Pro plugin from CodeCanyon.
- After downloading the WPB Form Popup Pro plugin, head over to your WordPress dashboard. Then click on the “Add New Plugin” option under the Plugins menu. Then click on the upload plugin and choose the Pro plugin zip file as shown in the screenshot below.
- After uploading the WPB Form Popup Pro plugin activate it. Please note that you will need to keep the free version of the form popup builder to enjoy the premium features.
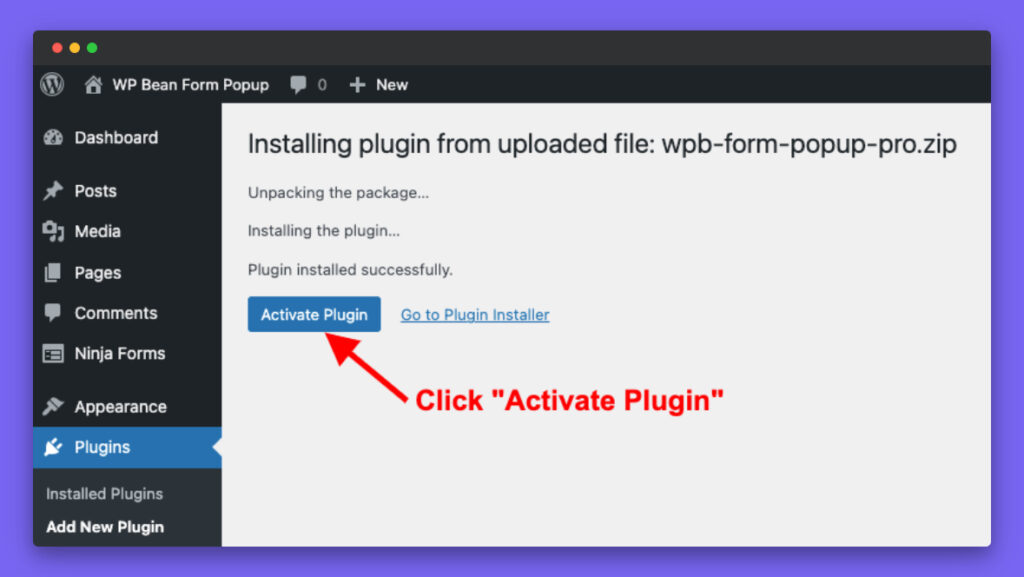
- To activate the premium version go to the license tab and connect your premium license.
After successfully installing and activating the free and premium version of WPB Form Popup, it’s time to see how you can set up your first form popup and explore the cool features this form popup builder has to offer.
Setup guide for WPB Form Popup
Creating a form popup using the WPB Form Popup builder
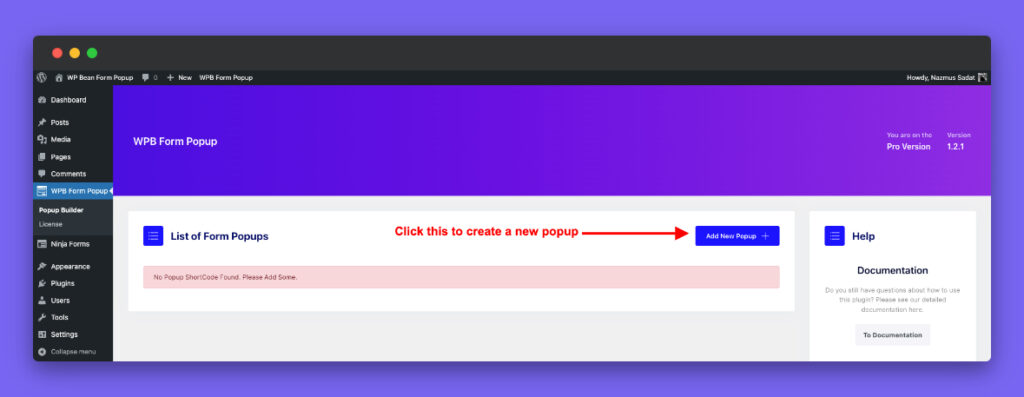
After successfully installing the form popup builder, you will see the “WPB Form Popup” in the menu of the WordPress dashboard. Click on it to go to the plugin dashboard where you will find the option to create new form popups and a list of all your previously built form popups. As you haven’t created any popups yet the list is empty. So, lets hit the button “Add New Popup” to create your first popup using the forms of existing form plugins.
WPB Form Popup general options
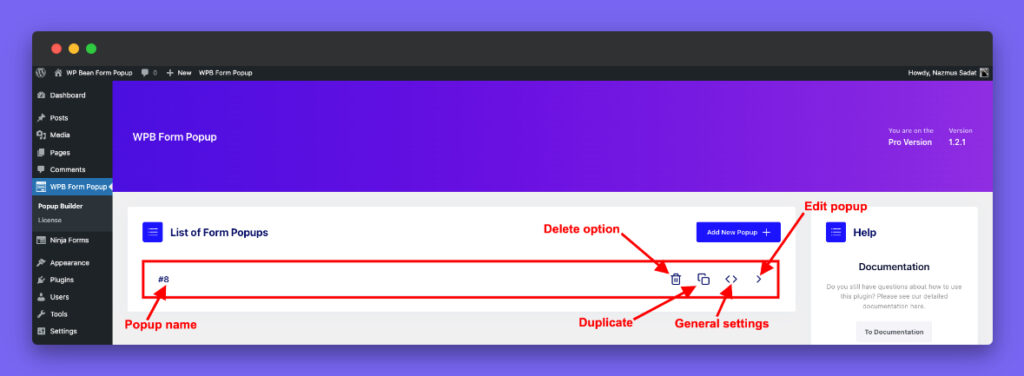
After clicking the “Add New popup” you will see a new popup appear in the list. Here you will see the option to edit the popup, delete the popup, duplicate it, and general options.
General settings
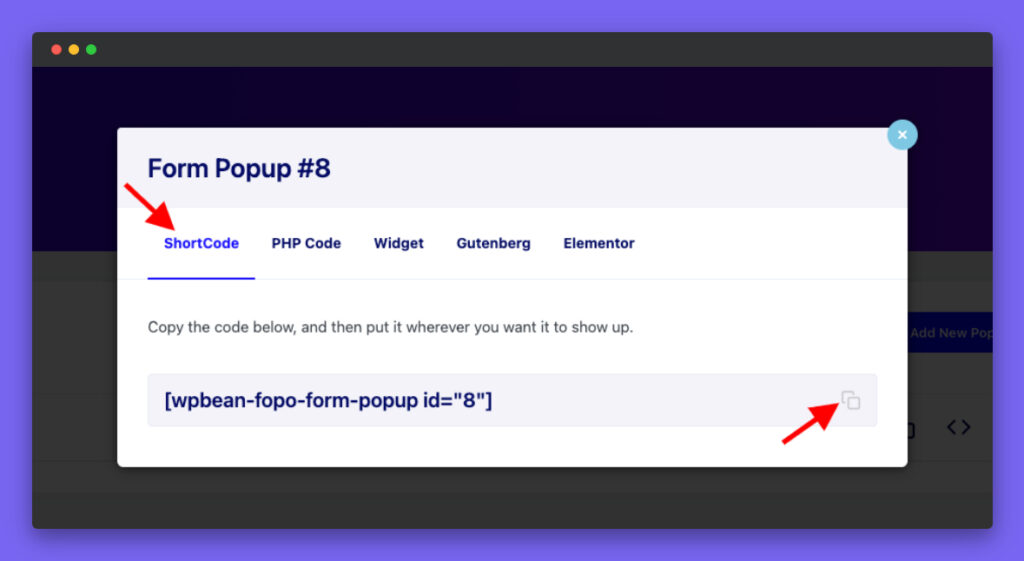
- Shortcode: Each form popup has a unique shortcode. You copy the shortcode and put it on any page and even place it inside any WordPress website builder.
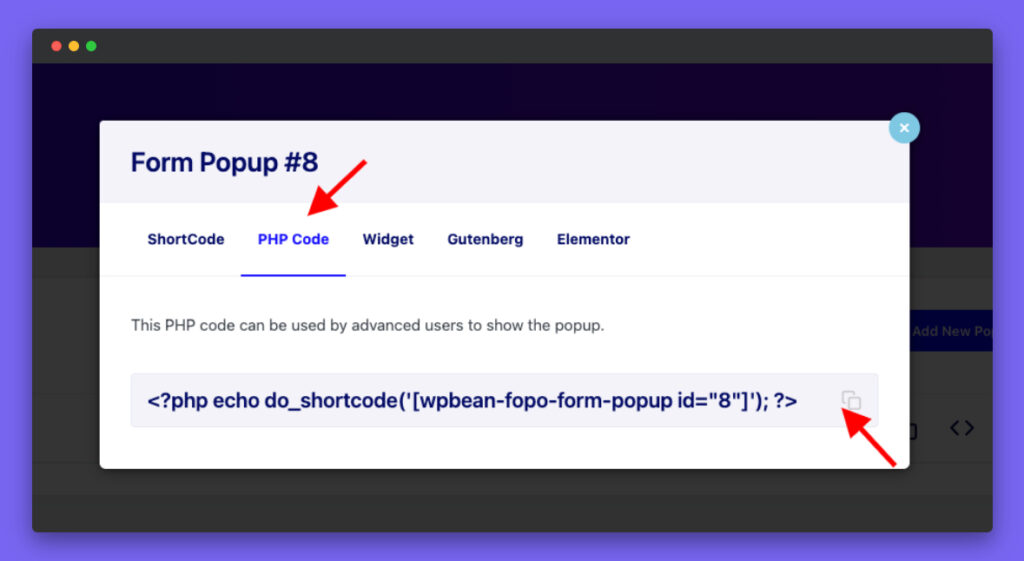
- PHP Code: This is an advanced option. If you understand PHP and coding then you can use this to show the popups.
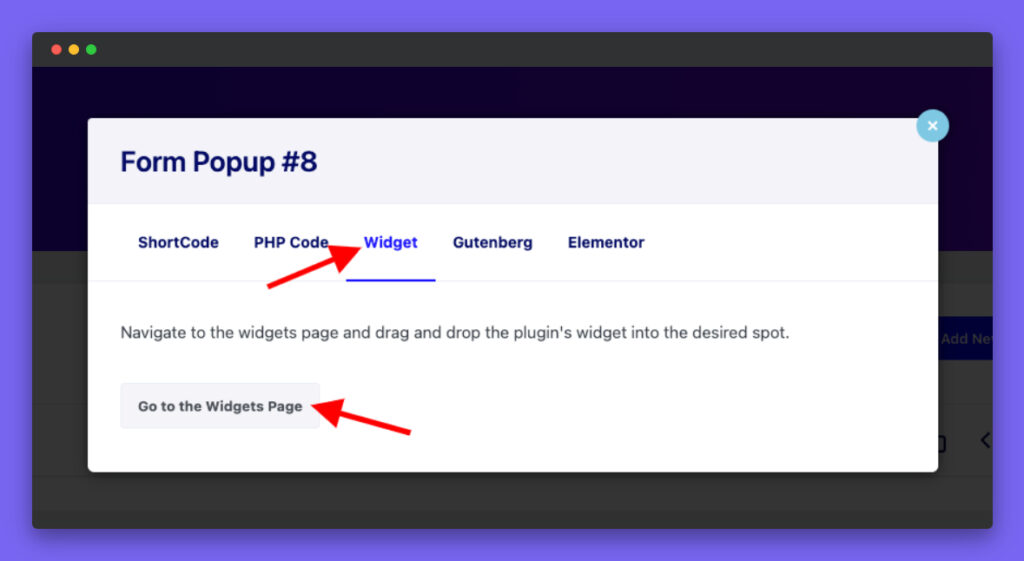
- Widget: If you are using widgets on your site then you can navigate to the widgets page and drag and drop the plugin’s widget into the desired spot.
- Gutenberg: If your site is using Gutenberg then you will be able to use this option.
- Elementor: This option is available for WordPress websites using Elementor page builder.
Form popup builder customization options
In order to navigate to the form popup options you need can click on either the form name or the edit popup option.
Form Settings
On the Form Settings page of the WPB Form Popup, you will find the following options-
- Shortcode Title: Here you can set any name for the form popup. Try to give a name that will help finding the popup easily in the future.
- Select a Form Plugin: On this option, you can select the form plugin. After selecting the form plugin, a new field will come up. This field will let you select the form you want to use for the popup.
- Work Without Any Form: With this option, you can create a popup without any form and use the “Content Before Popup” and “Content Before Popup” for the popup.
- Content Before Popup: Use this option for placing text before the popup.
- Content After Popup: You can use this for showing text after the popup.
Button Settings
You will get the following customization options on the Button Settings page of the WPB Form Popup builder:
- Button Text: On this field place your own text for the popup button.
- Button Size: Select your preferred button size using this option. You can make the button small, medium, or large.
- Content Before Button: You can place custom text before the button.
- Content After Button: Use this option for placing personalized text after the button.
- Add Custom HTML in Button: This option lets you add your own HTML code for placing icons or other objects.
Button or Image Style
WPB Form Popup gives you the flexibility to style your popup buttons and makes it look elegant in the following ways:
- Button Alignment: This option of the WPB Form Popup builder lets you make the popup button aligned to the left, right, and center.
- Button Spacing: You can add button spacing with this option.
- Button Margin: This lets you add outside spacing of the button.
- Button Border Radius: Set your preferred border radius using the button border radius.
Popup Settings
Customize your popups even further to make them more appealing to your audience using the options mentioned below:
- Close Popup on Background Overlay Click: If you enable this then the user can close the popup by clicking outside it.
- Close Popup on Escape Key: You can enable this by letting the users press the Escape key to close the pop-up.
- Show Popup Close Icon: Make the pop-up’s close icon visible or hidden using this toggle.
- Add Basic Style for the Popup Content: WPB Form Popup builder comes with basic styling to save your time. You can simply enable this option to have some basic styling, such as typography, margin, etc. If your theme already includes this styling, you can disable it.
- Popup Width: Change the popup window width using this option.
- Popup Height: You can easily change the popup window height. Also, you can remove the value for auto height adjustment.
- Popup Overflow: Easily customize the overflow of the form popup in the X and Y axis.
- Popup Overlay Background: Add your favorite color to the popup overlay background.
- Popup Background: You can also set an eye-catching color to your popup background using this option.
- Popup Color: Style the popup using your preferred or brand color.
- Popup Border Radius: Set the radius to make the popup more appealing.
- Popup Spacing: Spacings are important and can make the popup stand out and grab user attention.
- Add Animation in the Popup: You can also add cool animations to your form popup.
Popup Close Icon (Premium Feature)
- Popup Close Icon Type: WPB Form Popup builder lets you pick the kind of icon you want for closing the popup.
- Close Icon Placement: Decide where you want the close button to appear within the popup.
- Close Icon Color Type: Choose a color type to represent the “x” icon that closes the window.
- Close Icon stroke Color: Choose a color for the “x” that closes the window.
- Close Icon Outline Color: Define the color of the line around the close icon.
- Close Icon Font Size: You can adjust the size of the actual “X” symbol used for closing.
- Close Icon Size: Adjust the width and height of the close icon.
- Close Icon Position: Fine-tune exactly where the close icon sits. You can choose top, bottom, left, or right.
Popup Content (Premium Feature)
In this section, you can change the popup content layout, header text, and other things as listed below:
- Popup Content Layout: WPB Form Popup builder lets you choose how you want your popup content to be arranged.
- Popup Heading Text: Write a catchy headline that grabs attention.
- Popup Content: This is where you add your main message, offer, or call to action. You can even include shortcodes for special elements.
- Popup Image: Add a relevant image to enhance your popup.
- Image Size: Select the image size that fits your needs. You can select from thumbnail, medium, medium large, large, 1536*1526, and 2048*2048.
- Popup Columns Width: Popup image and content columns width.
- Popup Columns Color: Popup content columns color and background.
- Popup Content Alignment: Select popup content alignment.
- Popup Heading Alignment: Select popup heading alignment.
- Popup Heading Typography: Select popup heading alignment.
- Popup Heading Spacing: Popup heading typography can be updated here.
- Popup Heading Margin: Popup heading margin. Outside spacing.
Trigger settings (Premium Feature)
You can make the form popups appear based on various triggers, which include:
- Popup Trigger Type: WPB Form Popup builder lets you decide what makes your popup appear. By default, it shows up when someone clicks a button.
- Automatic Trigger Type: Want your popup to appear automatically? You can set it to show on page load, after a delay, when someone scrolls down a certain amount, or even as they’re about to leave the page!
- Choose the Pages or Posts: Choose exactly which pages or blog posts your popup shows up on for automatic triggers.
- Choose any Taxonomies: If you’re using categories or tags on your site, you can choose to only show your popup on content with specific ones.
- Custom URLs: Got a special landing page or another website you want the popup to appear on? Enter the custom URL here.
- Content Output: By default, your popup content is added automatically. You can also use a shortcode for more advanced setups.
- Save The Popup: No one likes seeing the same popup over and over. Enable this option to prevent visitors from seeing your popup again after they’ve already dismissed it.
Creating a form popup using the WPB Form Popup
Now that you’ve customized your popup settings, it’s time to connect it with an existing form on your site. In this example, we’ll be using Fluent Forms, but WPB Form Popup works with many popular form plugins including Contact Form 7, WPForms, and many more as we discussed earlier.
Just a heads up, for this walkthrough we used Elementor to build our test website, but the process should be similar for most website builders.
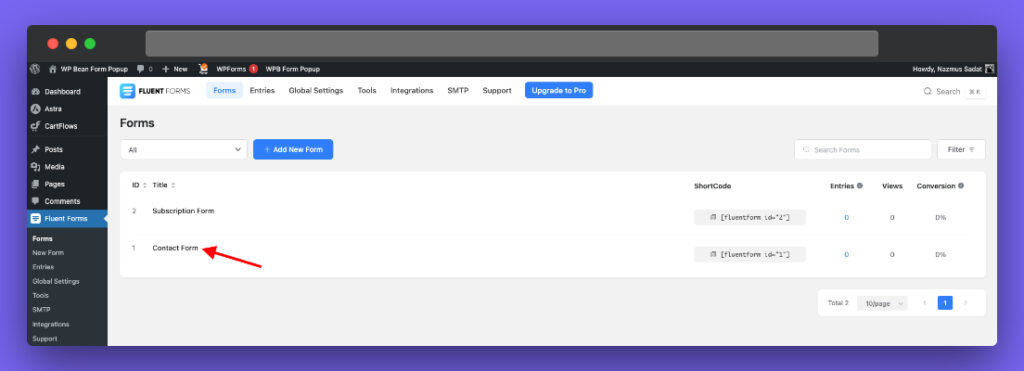
- We created a contact form using the Fleunt Forms which you can see listed as shown in the screenshot below.
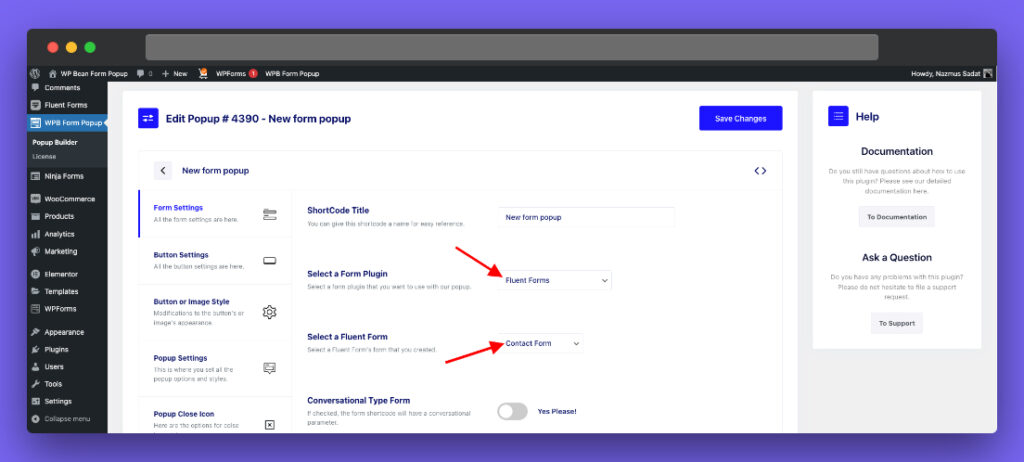
- Now, we will go to the dashboard of the WPB Form Popup plugin and edit the popup we previously created. Then from the Form Settings we will select Fluent Forms, select the Contact Form we just created, and save settings.
Let’s add your popup to our website!
Now that our popup is styled and connected to the form, it’s time to place it on our test website. In this example, we’ll add it to the first section of our test website’s homepage. Here’s how it works:

- We will navigate to the homepage and click “Edit with Elementor”. This will launch the page builder interface.
- Click on the first section where we will add the popup button as shown in the video above.
- Drag and drop the WPB Form Popup element onto that section.
- Click “Update” to save the changes.
- Now, we will preview the homepage. Click the “Contact Us” button (or whichever button you linked the popup to). Voila! The form popup appeared!
Wrapping it up
Ready to take your website to the next level?
WPB Form Popup builder can help you get more engagement and conversions from your website visitors. Follow this guide to get started and unlock the potential of WPB Form Popup today!
Got Questions? We’ve Got Answers!
Absolutely! Create different popups for different things and put them wherever you want on your site.
Yep! WPB Form Popup works great with popular form builder plugins like Contact Form 7 and WPForms.
Sure does! By making it easy for visitors to interact with your forms, you can make your website more user-friendly.
You got it! Change the colors, fonts, and anything else to perfectly match your brand.
WPB Form Popup tracks how many people see your popups, click on them, and take action. This way, you can keep improving your popups for even better results.
Totally! WPB Form Popup is designed to be easy to use for everyone.


Related Posts
Top 3 the Best WordPress Popup Plugins
Top 3 the Best WordPress Popup Plugins
How to warm up cold email without getting marked spam in 2025
How to warm up cold email without getting marked spam in 2025